

Key Takeaways
A careful match matters more than finding the cheapest listing when shopping for used BMW bumpers. Confirm the part, inspect its condition, and calculate the complete repair cost before paying.
- Match the bumper to your BMW’s model, year, body style, and trim.
- Use the VIN and OEM part number whenever possible.
- Inspect mounting tabs, sensor openings, paint, and signs of repair.
- Compare the purchase price with shipping, refinishing, hardware, and labor.
- Confirm fitment and the seller’s return policy before ordering.
Understand your BMW bumper options
A replacement bumper may be an original factory part, an aftermarket piece, or a repaired component sold as reconditioned. Each option can differ in material, finish, mounting accuracy, and included hardware. Start by deciding whether your priority is factory fit, a lower purchase price, or the simplest path to a finished repair.
OEM, aftermarket, and reconditioned bumpers
An OEM bumper was produced for the vehicle manufacturer and is generally the most straightforward reference for shape and mounting points. Aftermarket bumpers can cost less, but quality and fit vary by supplier. Reconditioned parts may have been repaired, sanded, or refinished, so ask exactly what work was completed rather than assuming the term means “like new.”
A used original bumper can be a practical middle ground, especially when the part is structurally sound and already has the correct openings. Factory-style fit matters because a small difference around an edge or bracket can create extra labor during installation.
| Option | Typical advantage | Main question to ask | Finish considerations |
|---|---|---|---|
| Used OEM | Original design and mounting layout | What damage was present? | May need paint correction |
| Aftermarket | Often lower purchase price | Who made it, and how is fit verified? | Usually requires refinishing |
| Reconditioned | Existing part has been repaired | Which repairs were performed? | Inspect repaired areas closely |
The right choice depends on the condition of the available part and the total installed cost, not just the advertised price.
Front bumpers versus rear bumpers
Front and rear bumpers are not interchangeable, even when two BMWs share a similar body shape. The front assembly may include openings for grilles, fog lamps, cameras, or headlight washers, while the rear may need cutouts for reflectors, exhaust outlets, or parking sensors. Compare the complete outline and equipment layout before treating a listing as compatible.
Also check whether the listing is for the bumper cover alone or for a larger assembly. A photograph can make a cover appear complete when reinforcement pieces, trim, or grilles are absent.
Bumper covers, reinforcement bars, and related parts
The visible painted skin is usually the bumper cover, but it is only one part of the system. Behind it may be an impact absorber, reinforcement bar, brackets, guides, grilles, trim pieces, and sensor retainers. Damage that looks cosmetic from the outside can extend to those hidden components.
Ask the seller to identify every included piece in writing. If you are replacing a cover after a collision, compare the old reinforcement and brackets as well; buying only the visible panel may leave you with another parts search during installation.
Matching the bumper to your BMW generation
BMW models often received visual or equipment changes during a generation, and a bumper from an earlier or later production period may not align correctly. Facelift changes can affect grilles, lamps, trim, sensor locations, and the shape of the mounting edges. Do not rely on the model name alone.
Use production dates, body style, and clear photographs to narrow the match. A sedan, coupe, wagon, convertible, and SUV may use different bumper designs even when their model badges look closely related.
Identify the exact bumper your BMW needs
Correct identification prevents most avoidable buying mistakes. Before browsing listings, record the vehicle’s model, production year, body style, drivetrain if relevant, and visible bumper equipment. Then compare that information against the seller’s description and photographs.
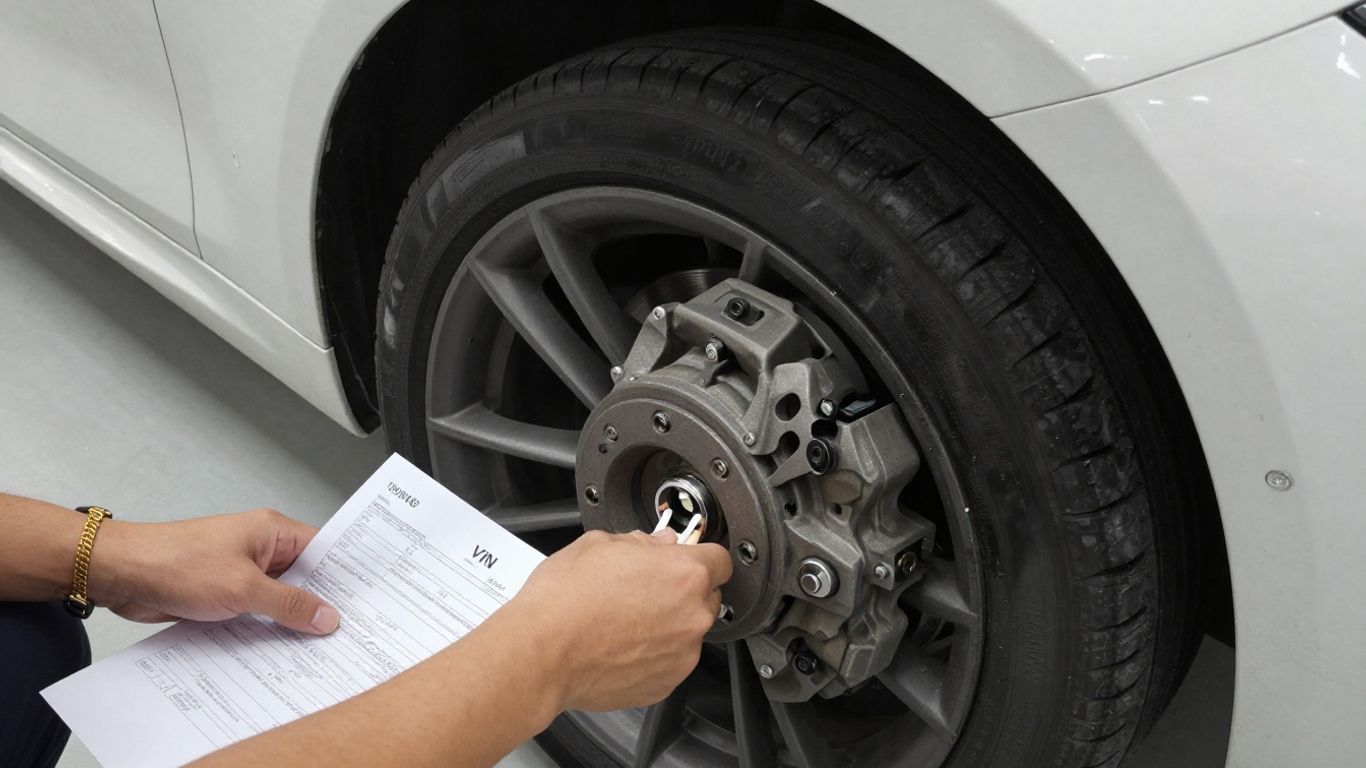
Confirm the model, year, and body style
Write down the full vehicle designation rather than a shortened model name. Include the chassis or generation when you know it, along with the production month or year shown on the vehicle records. Body style matters because similar BMW variants can use different covers and brackets.
Photograph your current bumper from the front or rear, both corners, and underneath if safe to do so. Those images give you a useful reference when a listing uses broad or incomplete naming.
Use the VIN and OEM part number
The VIN is the strongest starting point for checking vehicle-specific equipment. An OEM part number provides an even more direct comparison when it is visible on the old part or available through a trusted parts catalog. Numbers should be compared character by character, including suffixes.
A matching number still deserves a visual check because a listing may include only one component from a larger assembly. Ask whether the number is stamped on the item being sold or copied from a general catalog.
Check trim packages and appearance differences
Sport-oriented and luxury trim packages can change the bumper’s lower openings, lip shape, grilles, or decorative inserts. M Sport-style appearance is not automatically interchangeable with a standard bumper, even if the underlying vehicle model is the same. Color and trim photographs can reveal differences that titles omit.
Look closely at the lower edge, corner contours, center opening, and any attached trim. If the seller’s image shows a different profile from your original, pause and request more photographs before ordering.
Verify parking sensors, cameras, and headlight washers
Equipment openings are a critical part of fitment. Count the parking sensor holes, check their positions, and confirm whether the bumper has provisions for a camera or headlight washers. Some covers have smooth surfaces where your vehicle requires hardware, while others contain openings you do not need.
Ask whether sensor bezels, brackets, caps, and wiring retainers are included. A bumper can physically attach to the car yet remain unsuitable if the electronic equipment cannot be installed in its intended locations.
Evaluate the condition of used BMW bumpers
Condition descriptions such as “good” or “minor damage” are too vague on their own. A used bumper can have visible scratches, hidden distortion, brittle plastic, or missing tabs that are not obvious in a single photograph. Review each corner, mounting area, and opening before comparing prices.
Inspect cracks, dents, and warping
Look for cracks around corners, grille openings, and fastener holes, where stress often concentrates. Long creases, ripples, or uneven reflections may indicate warping rather than a simple surface dent. Ask for close-up photographs taken in good light instead of relying on heavily edited images.
A shallow mark may be easy for a body shop to correct, while distorted plastic can affect alignment across the entire panel. If the bumper is being shipped, request photographs of all sides before it is packed.
Look for repaired mounting tabs
Mounting tabs and guide edges are easy to overlook but essential to a clean installation. Check the upper lip, wheel-arch ends, lower edge, and the points where the bumper meets the fenders. Repaired tabs may show excess plastic, different texture, glue residue, or fresh paint.
Ask whether any tabs were rebuilt and whether all original brackets remain attached. A repaired tab is not automatically a reason to reject the part, but the repair should be disclosed and reflected in the price.
Check paint, finish, and color code
A painted bumper rarely matches perfectly without preparation, even when the listed color name is correct. Compare the vehicle’s paint code with the seller’s information, then inspect the panel for fading, overspray, peeling clear coat, and mismatched repairs. Metallic and pearlescent finishes can be especially difficult to blend.
An unpainted or scuffed cover may be the better value if you already expect refinishing. Conversely, a painted part in the correct color can save time, but only when its finish is close enough to avoid repainting the whole panel.
Ask about hidden damage and previous repairs
Ask direct questions about collision history, storage, heat exposure, plastic repairs, repainting, and missing hardware. Request an honest description of anything not visible in the main photographs. Sellers who can explain the part’s condition clearly are easier to work with if a problem appears later.
A low price is useful only when the part’s condition and limitations are clear.
Use the answers to decide whether the bumper is a repairable bargain or a part that will create more work than it saves. Keep written replies with the listing and order details.
Find reliable sources for used BMW bumpers
The best source is usually the one that can identify the part accurately and describe its condition without guesswork. Salvage businesses may have vehicle records and photographs, while local shops can sometimes help evaluate a part in person. Online sellers offer convenience, but you need stronger verification before shipping a large body panel.
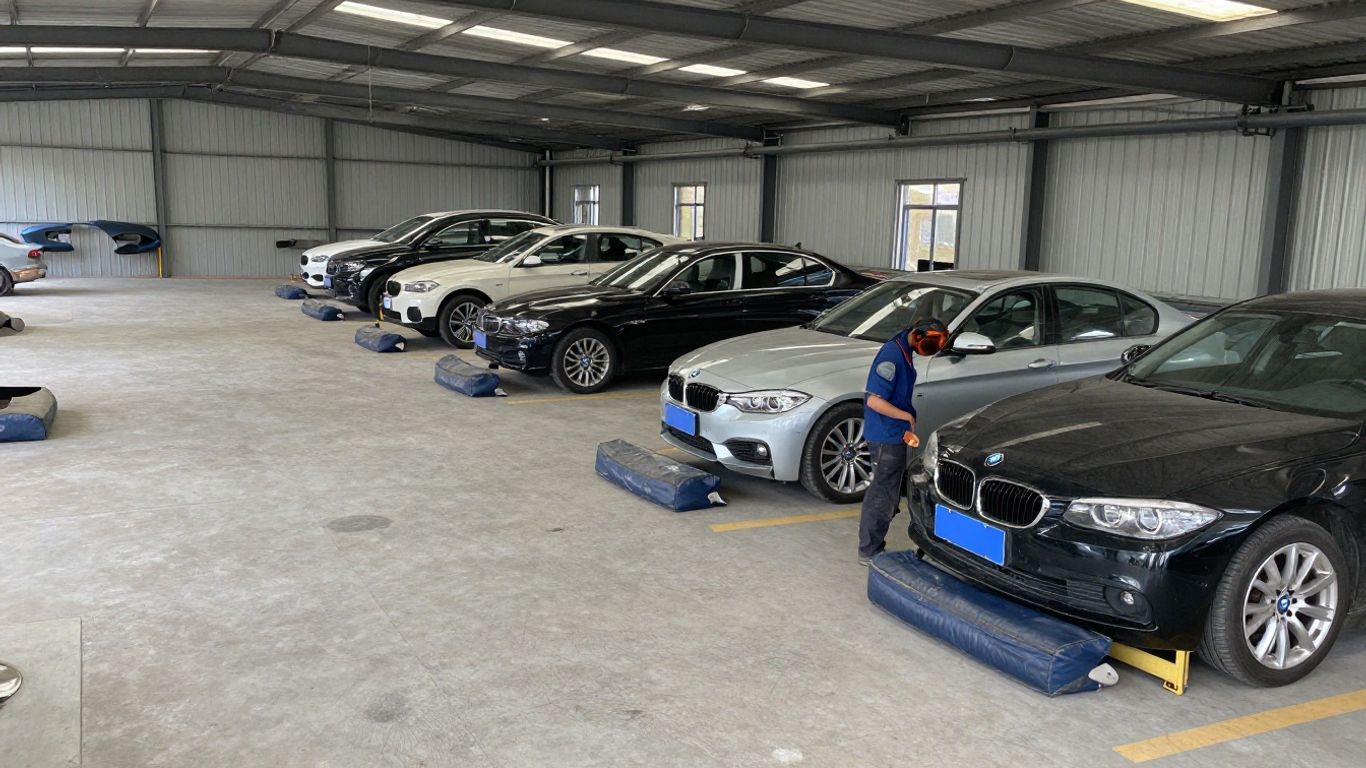
Salvage yards and auto recyclers
Salvage yards and auto recyclers may offer original parts removed from vehicles with known model and production details. Ask for the donor vehicle information, the part number, and photographs of mounting areas. Confirm whether the bumper is sold as a cover only or as a package with trim and brackets.
A recycler that documents condition and packaging practices gives you more useful information than a listing with a single distant photograph. Also ask how oversized body panels are protected during shipment.
Online BMW parts marketplaces
Online marketplaces make it easier to compare several used BMW bumpers, but their search labels are not always precise. Read the entire description, inspect every image, and message the seller with your VIN or OEM number. Save screenshots of the listing before purchase if the platform changes descriptions later.
Pay attention to seller ratings, return terms, shipping damage procedures, and whether the photographs show the actual bumper. Stock images are less useful than clear pictures of the specific part in inventory.
Local repair shops and body shops
A local repair or body shop may know which used parts sources provide accurate descriptions and dependable packaging. Even when the shop does not sell the bumper, its technician can sometimes identify whether a visible crack or missing tab is repairable. This advice can be worthwhile before committing to a part that needs paint.
Ask for an estimate that separates preparation, refinishing, removal, and installation. That makes it easier to compare a cheaper damaged part with a more expensive bumper that needs less work.
Private sellers and dismantlers
Private sellers and independent dismantlers can have hard-to-find parts, particularly for older vehicles. The tradeoff is that documentation, inspection access, and return protection may be limited. Ask for the exact part number, vehicle details, and close photographs before arranging payment.
If an in-person inspection is possible, bring your own reference photos and compare the tabs and openings carefully. Avoid rushing because the part is described as rare; scarcity does not remove the need to verify fitment.
Compare prices and total replacement costs
The purchase price is only one line in the repair budget. A bumper may need shipping, paint preparation, clips, sensor brackets, and professional labor before the car is ready. Compare complete scenarios rather than choosing the listing with the lowest headline price.
Estimate the bumper purchase price
Start with the price of the actual component and note what is included. A bumper with grilles, trim, bezels, and brackets may be a better value than a bare cover, even if its initial price is higher. Condition, rarity, color, and equipment openings can all affect the asking price.
Ask for a final price that includes any marketplace fees or seller charges. Then compare it with at least two similar listings using the same definition of “complete.”
Account for shipping and handling
Bumpers are large, awkward items that can incur substantial shipping costs and may be vulnerable to damage in transit. Confirm the carrier, packaging method, estimated delivery time, and process for reporting damage. Clarify whether the quoted price includes residential, liftgate, or other delivery charges.
Inspect the package before signing when possible, and photograph visible damage immediately. A shipping claim is easier to support when the condition is documented from the moment the bumper arrives.
Budget for paint matching and refinishing
Even a structurally sound bumper may need sanding, primer, paint, and clear coat. Ask a body shop whether the existing finish can be corrected or whether the panel should be fully refinished. Color code alone does not account for age-related fading or previous paintwork on the car.
Include blending adjacent panels if the shop recommends it. That expense can change which used bumper is the economical choice, especially when comparing a damaged but inexpensive cover with a clean part in a near match.
Include installation hardware and labor
Small items can add up: clips, rivets, guides, brackets, sensor holders, absorbers, and fasteners may be missing or unusable. Ask the installer to inspect the old hardware before ordering so replacement pieces can be purchased together. Labor also varies with equipment, hidden damage, and whether the old bumper is easy to remove.
Request a written estimate with parts and labor separated. This helps you see whether a slightly more expensive bumper could reduce preparation time and produce a better final result.
Verify fitment before you buy
Fitment should be confirmed from several angles rather than inferred from a model name. Compare the replacement with your original bumper, its equipment openings, and its attachment points. When details conflict, pause the transaction and ask the seller for clarification.
Compare photos with your original bumper
Place your reference photographs beside the listing images and compare the overall width, corner shape, lower edge, center opening, and wheel-arch transitions. Look for differences in the number and position of grilles, reflectors, trim strips, and sensor holes. A similar silhouette is not enough.
Ask for photographs from the same angles as your own images. This makes subtle differences easier to spot and reduces the chance that perspective or shadows will hide a mismatch.
Confirm sensor and grille openings
Count every opening and compare its position from left to right. Check whether the bumper has round sensor holes, camera provisions, headlight-washer openings, fog-lamp spaces, or grille sections that match your car. Missing openings may require additional work, while unwanted openings can be difficult to disguise.
Confirm whether inserts and bezels are included or merely visible in a reference photograph. The distinction should appear clearly on the invoice or order confirmation.
Check mounting points and brackets
Inspect the upper mounting edge, side guides, lower fastener locations, and rear attachment areas. Ask for close photographs of each corner and any bracket that looks repaired. If the seller cannot show these areas, treat the fitment as unconfirmed rather than assuming they are intact.
Compare the number and position of mounting points with your original bumper. The visible shape may match while a missing guide or distorted tab prevents a proper installation.
Review the seller’s return policy
Read the return policy before paying, especially for oversized or used body panels. Confirm the allowed time, restocking charges, return shipping responsibility, and conditions related to paintwork or installation. Ask how the seller handles a part that arrives damaged or proves incompatible despite an accurate vehicle description.
Do not modify, paint, or install the bumper until you have checked it against the car. A prompt inspection preserves your options if the part is not as described.
Prepare for installation and final inspection
Preparation makes the replacement less frustrating and helps reveal problems before the car leaves the shop. Have the part, hardware, tools, and fitment information ready before removing the original bumper. If the old panel came off after a collision, inspect the surrounding body structure rather than assuming the bumper was the only damaged item.
Gather replacement clips and hardware
Make a list of every fastener removed from the original bumper and compare it with what arrived in the package. Replace stretched clips, corroded screws, missing rivets, and damaged guides rather than forcing old hardware into place. Correct fasteners help keep the panel secure and aligned.
Keep sensor bezels, trim, grilles, and brackets organized during removal. Labeling parts or photographing their positions can save time when the replacement cover is ready to install.
Decide between professional and DIY installation
A confident DIY owner may handle a straightforward bumper cover replacement with suitable tools, a clean work area, and a factory-style mounting layout. Professional installation is safer when the vehicle has collision damage, complex sensors, headlight washers, camera equipment, or uncertain brackets. The decision should account for the risk of damaging the replacement while fitting it.
Ask a shop for an estimate before buying if you are unsure. Their labor advice may also reveal that additional supports or related parts are needed.
Test sensors, lights, and camera systems
After installation, test every system connected to the bumper before reinstalling all trim permanently. Check parking sensors, camera views, fog lamps, reflectors, headlight washers, and any warning messages. A system that worked before removal should be compared with its post-installation behavior.
If a sensor warning appears, inspect connectors, retainers, and alignment before assuming the sensor itself has failed. Record any fault codes and have them diagnosed rather than simply clearing the warning.
Check panel alignment and road readiness
Stand several feet away and inspect the gaps between the bumper, fenders, hood, trunk, grille, and lamps. The panel should sit evenly without excessive pressure, loose corners, rubbing, or exposed fasteners. Open and close nearby panels to make sure nothing catches.
Before normal driving, confirm that all hardware is tight and that no trim or wiring hangs below the vehicle. A short, careful check around the car can catch a loose edge before it becomes a safety or damage issue.
Conclusion
Buying used BMW bumpers successfully comes down to disciplined identification, honest condition checks, and a realistic installed-cost estimate. Verify the VIN, part number, openings, and mounting points before purchase, then inspect and test the replacement carefully once it is fitted. A little extra research can turn a tempting listing into a sound repair decision.