

Key Takeaways
Recycled M3 bumpers can be a practical way to restore an M3 while controlling cost and avoiding unnecessary waste.
- Confirm the bumper’s model year, chassis code, and equipment before buying.
- Inspect mounting tabs, sensor openings, grilles, and reinforcement compatibility.
- Separate paint damage from cracks, warping, and other structural concerns.
- Compare the complete installed cost with a new aftermarket alternative.
- Use careful installation and maintenance to extend the bumper’s useful life.
Understanding recycled M3 bumpers
Recycled M3 bumpers are previously installed parts that have returned to the automotive parts market through dismantling, salvage, resale, or reconditioning. Their condition can range from nearly new to visibly repaired, so the word “recycled” does not describe one uniform quality level. A careful buyer looks at the part’s history, construction, equipment openings, and actual photographs rather than relying on the label alone.
What “recycled” means in the automotive parts market
In this context, recycled usually means the bumper has been recovered from an existing vehicle and made available for reuse. Some parts are sold as removed, while others are cleaned, inspected, repaired, or prepared for repainting. The description should make clear whether the bumper is an OEM part, whether it has been previously repaired, and whether attached trim or hardware is included.
The useful distinction is between reuse and replacement manufacture. A reused bumper keeps an existing component in service, but it may still need preparation before installation. Ask for the exact condition, not simply a promise that the part is “good.”
OEM take-offs, salvage parts, and reconditioned bumpers compared
An OEM take-off may have been removed from a functioning vehicle during a conversion, upgrade, or insurance repair. A salvage bumper generally comes from a dismantled vehicle and may show impact marks, storage wear, or missing fittings. A reconditioned bumper has usually received some form of repair or cosmetic preparation, although the scope of that work varies by seller.
These categories overlap, so written details matter more than the category name. Find out whether repairs involved plastic welding, filler, heat reshaping, or only surface refinishing. Condition matters more than labels when two listings appear similar.
Which BMW M3 generations and bumper styles are commonly available
Availability changes with vehicle age, accident patterns, color, and regional demand. Older M3 generations may have fewer complete bumpers but more individual trim pieces, while newer cars may offer more listings with parking-sensor apertures, cameras, or model-specific lower sections. Front and rear designs also vary within a generation.
Use the vehicle identification number, model year, chassis code, and a clear photograph of your existing bumper when searching. A listing that says only “BMW M3 bumper” is a starting point, not reliable fitment confirmation.
How recycled bumpers support automotive waste reduction
Reusing a bumper can reduce the need to manufacture, package, and transport another replacement component. It also gives dismantlers a reason to recover usable body parts instead of sending every damaged vehicle component for disposal. The environmental benefit depends on the part being suitable for safe reuse and on the buyer avoiding unnecessary shipping or repeated returns.
The most responsible choice is not automatically the cheapest listing. A correctly identified part that installs successfully and remains in service for years avoids the waste associated with a poor fit, premature failure, or repeated repainting.
Evaluating bumper condition before purchase
A bumper can look acceptable in a small listing photograph and still have hidden damage around its edges or mounting points. Begin with a broad inspection, then move toward the areas that determine fit and stability. Recycled M3 bumpers are worth considering only when the condition can be assessed with reasonable confidence.
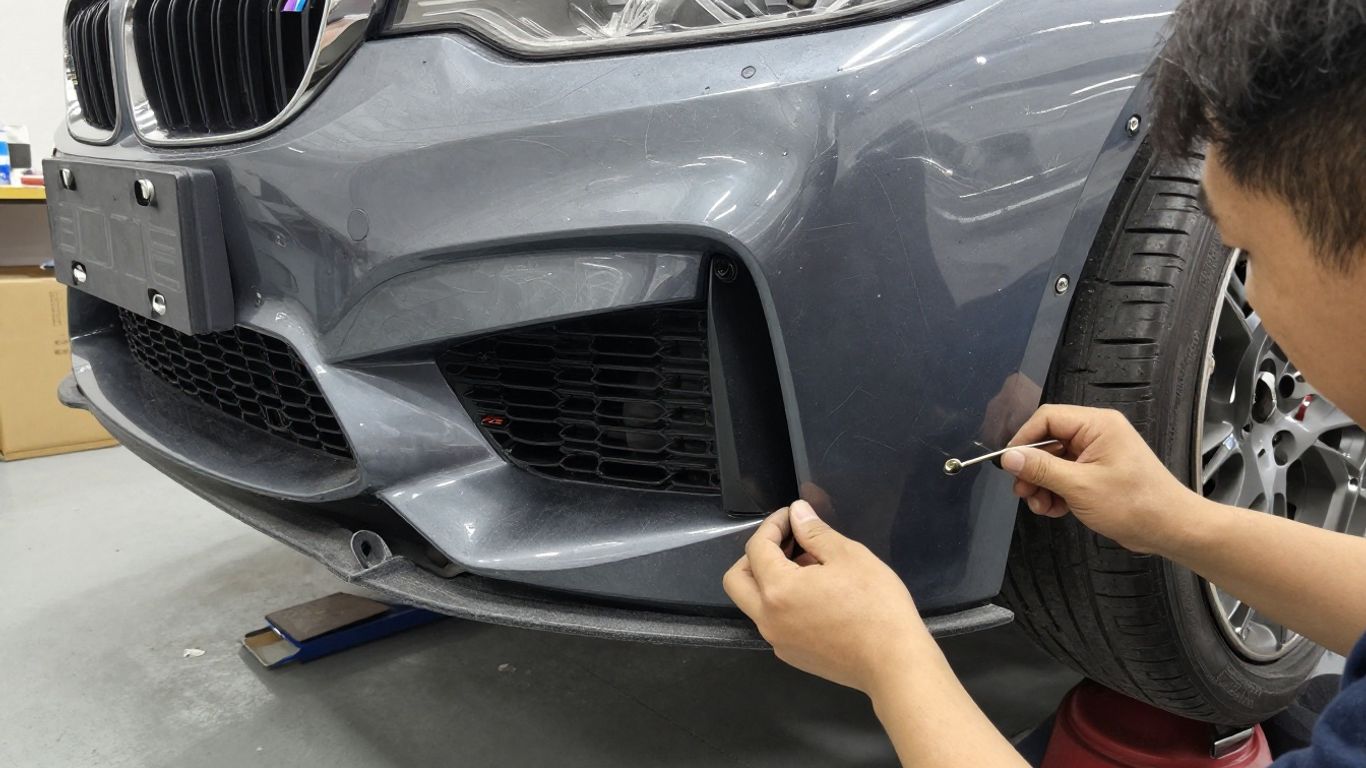
Request clear images of the outer face, inner surface, corners, lower edge, tabs, brackets, and every equipment opening before committing to the purchase. If the seller cannot show a critical area, treat that uncertainty as part of the buying risk.
Inspecting cracks, warping, dents, and stress marks
Look for splits around corners, long cracks extending from mounting holes, ripples in the plastic, and areas that do not sit on a flat plane. Stress marks may appear as whitening, fine branching lines, or stretched plastic near an impact point. Dents can sometimes be reshaped, but a warped bumper may continue to resist proper alignment.
Ask whether the photographs were taken before or after repair. A freshly painted surface can conceal previous damage, while an unpainted surface may reveal repairs more honestly. Check the underside whenever possible, since impact evidence often remains visible there.
Checking mounting tabs, brackets, grilles, and sensor openings
Mounting tabs are small but decisive. Missing, torn, or distorted tabs can create uneven gaps even when the visible skin looks clean. Also confirm whether brackets, grilles, tow-hook covers, reflector surrounds, mesh, and sensor retainers are included or must be transferred from the original bumper.
Sensor openings should be round, correctly positioned, and free from heavy repair material. A bumper with an altered opening may require additional work before a sensor can sit at the correct angle. Inventory these details before comparing prices.
Distinguishing repairable cosmetic damage from structural concerns
Light scratches, paint loss, and small dents are often preparation issues rather than reasons to reject a bumper. Cracked mounting zones, severe warping, torn plastic around fasteners, and missing sections deserve more caution because they can affect installation and durability. The right repair shop can advise whether plastic repair is sensible, but the buyer should not assume every defect is economical to fix.
A useful test is to ask what must happen before the part can be painted and installed. If the answer includes extensive reshaping, replacement tabs, several missing pieces, and uncertain sensor work, the apparent bargain may disappear.
Reviewing photos, part numbers, and seller descriptions
Photographs should support the written description, not substitute for it. Compare the part number or molded identification marks with your vehicle information, and ask for close-ups of every reported defect. A seller who documents flaws clearly is easier to deal with than one who uses broad phrases such as “minor damage” without measurements or images.
Keep copies of the listing, messages, and agreed inclusions. Those records help if the delivered part differs from the advertised condition, especially when the bumper is shipped in oversized packaging.
Confirming fitment for your BMW M3
Fitment is more than matching the badge on the boot lid. M3 bumpers can differ by chassis, facelift, body style, equipment package, market, and exhaust layout. Confirming those details before purchase is usually faster and cheaper than correcting a mismatch after delivery.
A good fitment check combines the vehicle identification number with photographs and part details. It should also account for the components that attach to the bumper, because a bare shell may not include the hardware required for your particular car.
Matching the bumper to the model year and chassis code
Start with the model year and chassis code, then compare the bumper’s part number and shape with your original. Changes during a production run can affect grille profiles, lower edges, reflector positions, and sensor locations. When a listing covers several years, ask the seller to identify the exact donor vehicle rather than assuming the entire range is interchangeable.
Photographs of the vehicle’s front or rear corner can help resolve differences that a generic catalog description misses. If the seller cannot confirm the donor chassis, pause before paying.
Comparing standard, Competition, and special-edition configurations
Standard, Competition, and special-edition configurations may use different trim, grilles, diffusers, or openings even when the basic bumper shape appears similar. Some cars also have distinctive lower sections or finish details that affect the parts needed for a complete installation.
Write down the equipment on your car and compare it line by line with the listing. A bumper can be physically close yet still require expensive trim transfers or modifications to look and function correctly.
Verifying rear parking sensors, cameras, reflectors, and exhaust cutouts
Rear bumpers need particular attention because equipment openings must match the car’s systems. Count the parking-sensor apertures, check the camera position, compare reflector shapes, and measure or visually match the exhaust cutouts. A bumper with no openings is not automatically wrong, but it may not be ready for your vehicle.
Ask whether sensor holders and camera surrounds are molded into the bumper or supplied separately. Confirming this detail early prevents a second search for small parts that can be surprisingly difficult to source.
Checking compatibility with reinforcement bars and related hardware
The outer bumper cover works with reinforcement bars, absorbers, brackets, guides, fasteners, and underbody panels. Damage to the visible cover may be accompanied by bent or missing supporting parts, especially if the donor vehicle suffered a rear or front impact.
Compare the replacement with the hardware removed from your car before painting. If the mounting points do not line up during a dry fit, stop and investigate rather than forcing the plastic into position.
Comparing recycled bumpers with new aftermarket parts
The choice between a recycled OEM bumper and a new aftermarket part depends on more than purchase price. Material feel, contour accuracy, included equipment, preparation time, and shipping can change the final result. A fair comparison uses the total installed cost and the amount of uncertainty each option carries.
New aftermarket parts may arrive unpainted and require their own correction, while a recycled part may already have the right factory shape but need cosmetic work. Neither option should be judged from the listing price alone.
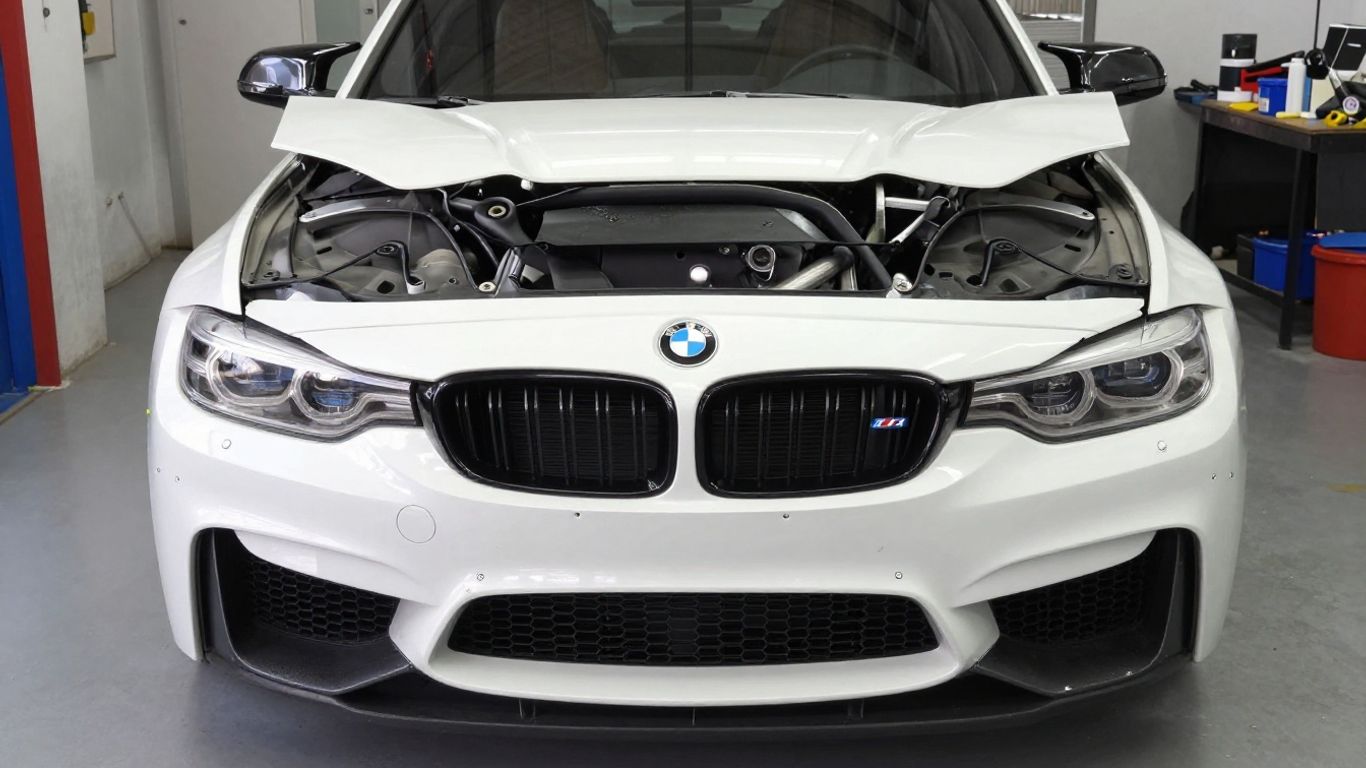
Differences in material quality and panel alignment
OEM and aftermarket bumpers can differ in plastic composition, thickness, flexibility, and the precision of molded mounting points. Those differences may show up as uneven panel gaps, difficult grille installation, or a lower edge that needs adjustment. A recycled OEM cover is not automatically perfect, but its original vehicle-specific design can be an advantage.
Panel alignment should be assessed during test fitting, not inferred solely from a clean photograph. Small variations may be manageable; persistent gaps or tension around several mounting points indicate a larger problem.
When an OEM recycled bumper is the better value
A recycled OEM bumper may offer better value when it matches the chassis and equipment, retains usable factory mounting points, and needs only ordinary preparation. It can also make sense when the original trim, sensors, and brackets are easier to transfer to the factory shell than to adapt to a different design.
The calculation should include paintwork, missing parts, freight, and possible repairs. The lowest purchase price is rarely the whole cost of restoring a bumper correctly.
Situations where an aftermarket replacement may be more practical
A new aftermarket bumper may be more practical when a suitable recycled part is unavailable, when the used options have extensive damage, or when a complete new shell is easier for a repairer to prepare. Availability and delivery time can matter as much as material preference, particularly when a vehicle is needed for daily use.
Before choosing it, ask the repairer about expected fit, required modifications, and warranty terms. A lower-cost new part that needs substantial reshaping may not be a simpler route.
How paintwork and preparation affect the total cost
Both used and new bumpers commonly need cleaning, sanding, primer, color matching, and clear coat. A recycled bumper may also require plastic repair or removal of old paint, while an aftermarket bumper may need edge correction and extra test fitting. Labor can therefore outweigh the difference between two purchase prices.
Request a written estimate that separates the part, freight, repairs, preparation, paint, and installation. This makes the comparison more realistic and gives you a clearer basis for deciding whether a cosmetic defect is worth accepting.
Buying recycled M3 bumpers from reputable sources
A reputable source should be able to identify the donor vehicle, describe known damage, and explain what is included. Professional photographs and a clear return process are useful signs, but they do not replace your own fitment checks. The strongest transactions leave little ambiguity about condition, delivery, and responsibility.
When buying across cities or nationwide, account for communication time and freight handling as well as the advertised part price. A nearby source may simplify inspection, while a distant listing may offer better availability.
Choosing between auto recyclers, specialist dismantlers, and private sellers
Auto recyclers often provide inventory systems, condition notes, and established shipping processes. Specialist dismantlers may know the platform in greater detail and may have related trim or hardware available. Private sellers can sometimes offer useful history, but inspection, payment protection, and returns may be more limited.
Choose the source that can answer the practical questions. A lower price is less attractive when the seller cannot confirm the part number, donor vehicle, damage, or delivery arrangements.
Questions to ask about ownership history and previous repairs
Ask why the donor vehicle was dismantled, whether the bumper was involved in the original impact, and whether repairs were performed before sale. Find out if the bumper has been painted, stored outdoors, or exposed to heat that could affect its shape. Also ask whether the included trim came from the same vehicle.
These questions are not excessive for a large, model-specific body part. They help distinguish normal cosmetic wear from a part with a complicated repair history.
Understanding warranties, return policies, and shipping damage coverage
Read the warranty and return terms before placing the order. Confirm how long you have to report damage, whether painted or modified parts can be returned, and whether the seller covers damage caused during transport. Photograph the packaging and bumper as soon as it arrives, before installation or repair work begins.
A policy is useful only when its conditions are understood. Keep the invoice, listing, freight documentation, and delivery photos together until the bumper has been test-fitted successfully.
Planning for oversized packaging and freight delivery
Bumpers need large protective packaging, and careless handling can damage corners, tabs, or painted surfaces. Ask how the part will be supported, whether delivery is curbside, and whether someone must be present to inspect it. Measure access points at your home or workshop if the shipment is unusually large.
Inspect the package before signing where the carrier allows it. Visible crushing or punctures should be recorded immediately, since later claims can be harder to support.
Preparing and installing a recycled M3 bumper
Installation begins before the bumper reaches the paint booth. Photograph the original assembly, label fasteners, and identify each sensor, grille, bracket, and trim piece as it is removed. Good preparation protects adjacent components and makes it easier to spot a fitment problem early.
If the work involves airbags, radar, cameras, or electrical systems, follow the vehicle manufacturer’s service information and use a qualified technician where appropriate. Bodywork that looks simple can involve systems beyond the plastic cover.
Removing the original bumper without damaging adjacent components
Remove fasteners methodically and support the bumper as the final clips and bolts come free. Protect painted fenders, lamps, wheel-arch liners, exhaust surrounds, and wiring connectors from tools and sharp edges. Do not pull on a sensor harness or force a stuck guide simply to save time.
Label left and right components and store small hardware in separate containers. The original bumper can also serve as a template for transferring clips and trim.
Test-fitting the replacement before sanding or painting
Install the replacement loosely with the main guides, brackets, and a few fasteners in place. Check the gaps at the lamps, quarter panels, boot or bonnet edge, wheel arches, and lower trim. Test the grille and sensor openings as well, since paint preparation should not begin until the shape is confirmed.
A dry fit may reveal a missing bracket, a distorted tab, or a mismatch that photographs did not show. Finding that issue before paint avoids paying twice for preparation.
Transferring trim, sensors, grilles, and mounting hardware
Transfer components carefully and compare each one with the receiving opening before tightening it. Old clips can be brittle, and sensor retainers may need to remain in their original orientation. Replace damaged fasteners rather than relying on improvised ties or excessive adhesive.
Keep unused parts until the installation is complete. They may reveal that a piece was omitted from the replacement or help identify a difference between the donor and your M3.
Calibrating driver-assistance features after installation
If the bumper carries parking sensors, cameras, radar equipment, or other driver-assistance hardware, installation may require a system check or calibration. The exact procedure depends on the vehicle and equipment, so follow the appropriate service information rather than assuming that a warning light is the only sign of a problem.
After installation, check for fault messages and confirm that sensors and cameras operate as expected in a safe setting. A body panel is complete only when the equipment mounted to it is correctly positioned and functioning.
Maintaining the replacement bumper and reducing future waste
A replacement bumper lasts longer when its paint, mounts, and attached equipment are protected from avoidable stress. Simple checks after rough roads, minor contact, or seasonal weather can prevent a small defect from becoming a second replacement. Maintenance also preserves the value of the part if the car is later sold or dismantled.
The same approach applies to waste reduction: repair suitable damage early, keep reusable trim organized, and send unrecoverable plastic through an appropriate automotive recycling channel.
Protecting painted surfaces from UV exposure and road debris
Regular washing removes grit that can abrade clear coat around the lower edge and wheel arches. Use products suitable for automotive paint, avoid aggressive brushes, and consider practical protection for areas that receive heavy road spray. Parking choices and prompt removal of bird droppings or road contaminants also help preserve the finish.
A protected surface is easier to repair and less likely to require complete refinishing. That reduces both future cost and material use.
Preventing loose mounts and vibration-related damage
Check bumper gaps, fasteners, guides, and wheel-arch liners after installation and after any significant impact. Loose mounts allow vibration, which can enlarge holes, fatigue tabs, and create rubbing against nearby panels. Replace missing clips instead of leaving the bumper supported by tension or improvised hardware.
Pay attention to new rattles or changes in panel alignment. They are often early warnings that a small mounting issue needs attention.
Repairing minor scuffs before they become larger problems
A shallow scuff can expose paint layers and leave the surface more vulnerable to moisture, grime, and additional abrasion. Have the area cleaned and assessed before polishing, filling, or touch-up work. More serious gouges may need plastic repair and proper refinishing rather than repeated cosmetic treatments.
Early repair is especially sensible around corners and lower edges, where damage can spread through repeated contact. Keep records of the repair products used if the bumper needs further work later.
Recycling the old bumper through an approved automotive facility
When the original bumper is no longer suitable for repair, ask an approved automotive recycling facility whether it accepts the material. Some facilities can recover usable trim, brackets, or sensors before processing the plastic. Remove personal items and separate components only when the facility’s guidance allows it.
Do not leave a damaged bumper beside general household waste without checking local rules. Proper handling gives the remaining material a better chance of being reused or processed responsibly.
Conclusion
Choosing recycled M3 bumpers works best as a measured process: identify the exact configuration, inspect the part beyond its painted surface, compare the full installed cost, and plan delivery and installation carefully. When the bumper is a sound match and its condition is honestly documented, reuse can restore the car while avoiding unnecessary replacement waste.